ASSIGNMENT:
Edit Photos in GOOGLE + & Create Custom Site Banners
Deadline: Friday, May 4th, 6 p.m.
Deadline to Respond
to Custom Banner Forum: Sunday, May 6th, 6 p.m.
1. Create a CUSTOM BANNER Assignment page on your site.
Read the article below on using Google + Creative Kit. Think about the audience for your blog/website. You will be creating 3 banners this week for your website pages.
Take photos or upload previously shot photos or images from Google images. Now edit and apply effects using Google + Creative Kit to the photos which will be later used as custom banners for your website pages. Pay attention to design and make sure you are creating a cohesive visual look for your site in terms of colors and mood that fits your overall website/blog. (Chapter 4 in our textbook reading talks about visual design.)
2. Now logged in to your site, click on DESIGN in the top menu bar. Click on the orange EDIT IMAGE icon in the top right of the banner photo.
Upload your new edited banner photo you created. Now save it ONLY to 1 page on your site. Repeat this process for a total of 3 pages.
(NOTE: If you are an experienced Photoshop user and have access to the program, you can create banners using Photoshop. But please create ONE GOOGLE + BANNER, include a title identifying it as your Google + Banner.
(A few of you already have taken the initiative and made banners already for you site. You can include these banner images on your assignment page. Please still create 1 new banner using Google + Creative Kit. )
3. Now drag 3 TITLE TEXT icons to your CUSTOM BANNER Assignment page and 3 PICTURE icons. Type in the name of the page on your site that matches the banner image you upload. MAKE YOUR IMAGE LARGER on your page. Click on the image, then click on the red handle in the corner and drag outwards. Repeat several times until you have enlarged your banner to a big size.
You should have three images and three page name titles. (For Photoshop users, please mention which ones are created in Photoshop and which image (or images if you want) were created in Google + Creative Kit.
4. FORUM POSTING: Post your link to your Custom Banner Assignment page in our Custom Banner Forum section here in WEEBLY. (Tip: use Threaded view to see other's comments easily)
DEADLINE to POST LINK ON FORUM: FRIDAY, MAY 4, 6 PM
RESPOND TO CLASSMATES' CUSTOM BANNERS: Now go look at everyone's banners. Check out the banners as they appear first on the assignment page and then see how they look on the pages themselves.
Does the image style work with the overall site? Do the colors work well together? If there is text, does it fit with the image message? Does the text font/s work well? What exactly do you like? Think could be tweaked? Ask how people created a particular image!
DEADLINE TO RESPOND ON FORUM: SUNDAY, MAY 6, 6 PM
How to Use the Google Plus Creative Kit to Edit and Spice Up Your Photos
Could it be the Instagram effect…or more aptly, the Picnik effect which is Google’s own online photo-editing app? One click photo editing apps are all the rage these days. More for fun and less for serious image stylists, spicing up your photos has almost become a social show-off activity in itself. So, it’s no surprise that Google recently brought out the Google+ Creative Kit.
Google+ Creative Kit is an online photo editing application that enhances the photos in your Google+ albums with some cool effects. It is powered by Picnik. The best thing about it – you can go crazily creative with photos right in your browser and all within your Google+ profile. Let’s try it out.
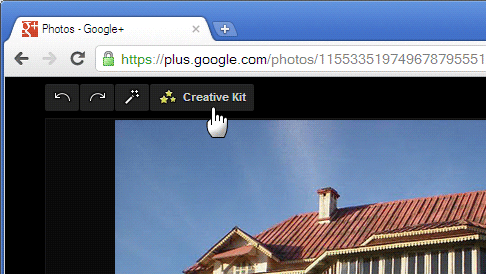
Open Google+’s Creative Kit by selecting a photo from your photo albums and then choosing Edit. You can see the Creative Kit button right there. Here’s how the interface looks:
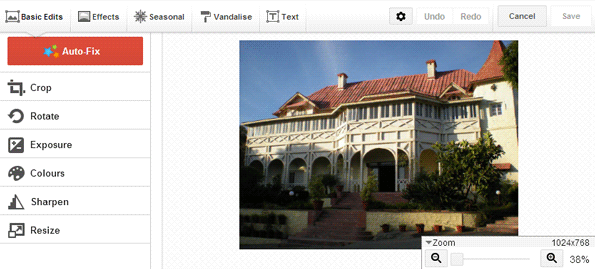
The Google+ Creative Kit includes basic editing tools and a number of pre-set image filters and a text tool. The basic edits are well covered with image adjustment tools and an Auto-fix button.
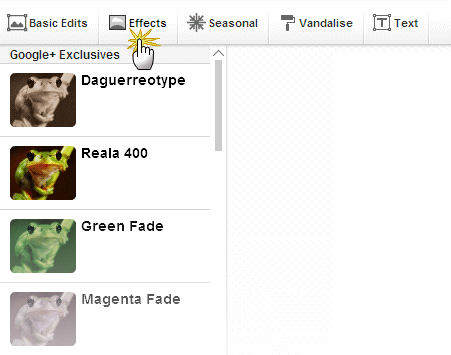
It’s when you hit Effects, the online app gets into the creative side of things with a slew of photo filters. All are nearly one-touch with sliders to set the degree of effect you want to apply. In theTouch-Up section, you can set brush size and a few other parameters.
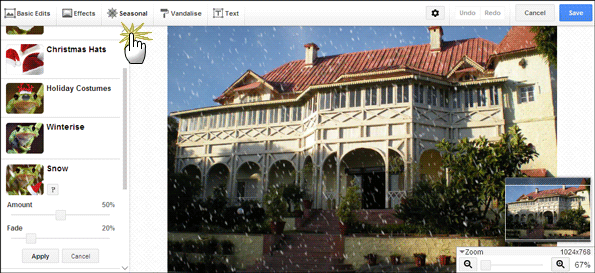
Google hasn’t forgotten its holidays, with its Seasonal filters. This section will keep changing with different holidays around the year. What’s a photo-app if you can’t go berserk on your friend’s mug shot?
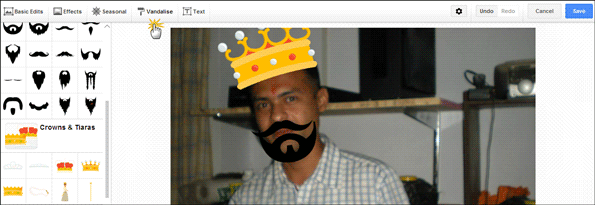
The Vandalize section is just for that. From Speech Bubbles to Vampire Eyes, try out the effects for fun. Oh! You can go to work on your photo too. But, remember, for your website/blog, you want to create images that will appeal to the readership you hope to attract to your site! Keep your audience's tastes in mind!
After all this, you would think that the Text section would be a bit humdrum. But with the cool lineup of fonts, you will have plenty of design options and can even create e-cards s on the Creative Kit.
The Creative Kit and its lineup of effects give you the freedom to mix-match, and mash your photos. Plus, you can tag and share them right from there itself. Try it and invite a few comments with your creations.
The Creative Kit and its lineup of effects give you the freedom to mix-match, and mash your photos. Plus, you can tag and share them right from there itself. Try it and invite a few comments with your creations.